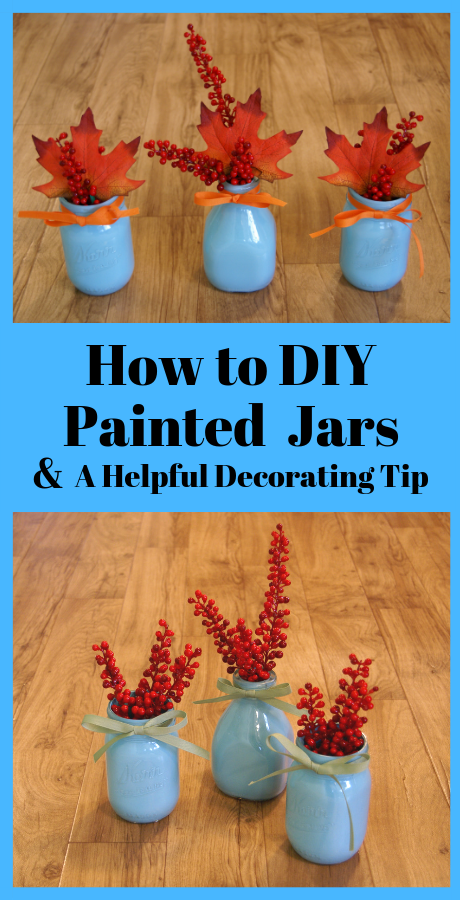
How To DIY Painted Jars & A Helpful Decorating Tip
I’m going to share how to make these painted mason jars, why I think it’s important to decorate (even just a little!) for each season, and a design tip that has changed the way I decorate and made me much happier. I think you’ll find that applying it in your decorating will help you be happier too!
First, let’s get painting!
I love painted mason jars and painted glass because they’re so easy and versatile. You can use whatever colors you like best, and it’s a pretty inexpensive way to change up your decorations. They make great gifts too!
This post contains affiliate links, which means I receive a small portion of sales, at no additional cost to you, if you click through and make a purchase. All recommendations are my own. Thank you for supporting my blog through your purchase!
SUPPLIES YOU’LL NEED
- Canning Jars (Kerr and Mason jars work great, but you can use any container really. The “vase” in my photos is a hot cocoa jar!)
- Wax Paper (for protecting your work surface)
- Paint (I’ve linked to the Ceramacoat brand that I like best. I used Caribbean Blue, and the closest I could find online is Mermaid Blue. Make sure whatever paint you buy lists glass as one of the materials it can be applied to.)
SUPPLIES FOR INSIDE THE JARS:
- Plastic Berries (I’ve linked to berries that look similar to the ones I bought. (Ooh, they come in blue too!) I like plastic better than the foam ones at craft stores. They’re a little more expensive, but they hold up better. I tried the foam kind, and they tended to drop pieces of foam, and when I went to dust them, a bunch of dye came off. Yuck!)
- 3/8″ Grosgrain Ribbon (in Spring moss green and orange)
- Faux Leaves (These look like the ones I purchased and have good reviews.)
- Paper towels (in the bottom of the jar to keep the berry “stems” from scratching your paint job.)
TO GET STARTED spread your wax paper out. Then simply pour some paint into your first jar. It doesn’t take a lot, but make sure you get enough so that it starts running down the inside easily. I held my jar up at an angle and started rotating it to get the paint to evenly coat the sides from bottom to top. (Think of a cement truck rotating.)
Once the paint reaches the lip of the jar, pour the excess into your next jar. (This is why it’s handy to make more than one at a time.) Place your finished jar upside down on the wax paper. Repeat until you have all your jars painted.
I checked my jars about three times (every 15 minutes or so) to wipe off the lip to keep any paint from caking there. When I turned them back over, I placed them on a clean section of the wax paper. After about 45 minutes, I turned them right side up. I checked them two or so more times, tipping them and rotating them to make sure paint was not gathering in a blob at the bottom.
Then I let them set for 24 hours before filling them with the berries. (I didn’t want the stems gouging the paint. Because we all know we can get overzealous while decorating. :D) I placed a couple paper towels in the bottom of each jar to be extra certain the paint didn’t get scratched. Bonus: this helped the berries have some extra height.
Tie a pretty ribbon around the jar, and voilà! You’ve made beautiful decorations!
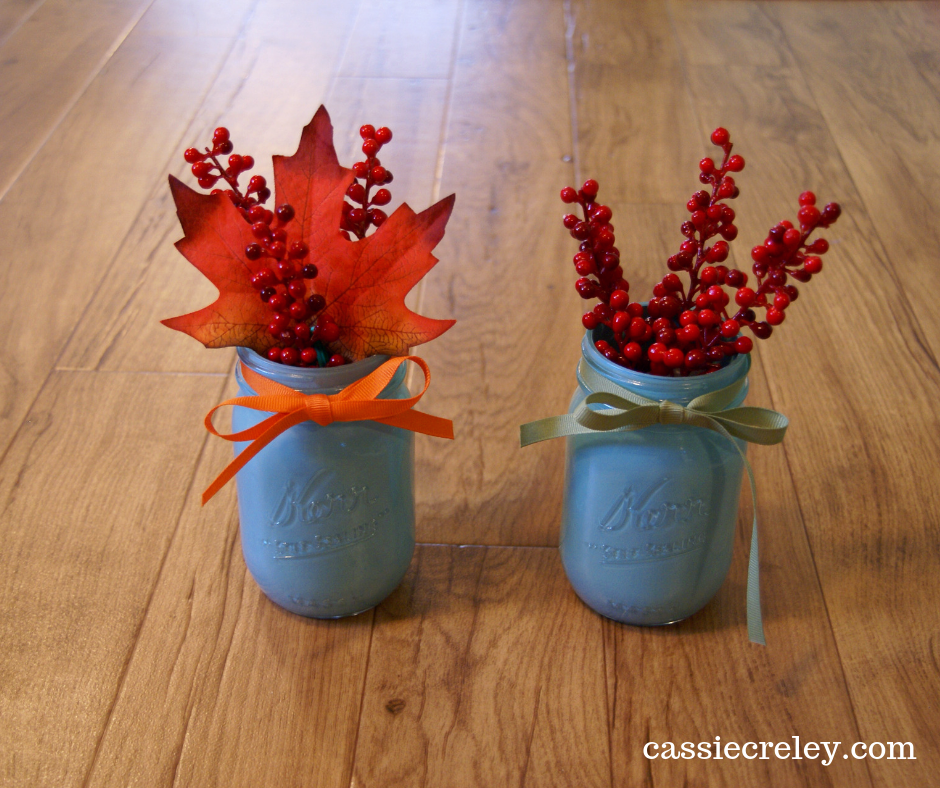
You can also add leaves for fall. I found leaves that had red in them so that they looked like they matched the red berries. I like that this décor doesn’t scream “Halloween” so I can have them up early, and have them up through Thanksgiving.
You could also easily add in some pink and red ribbon for Valentine’s Day, and cluster blue Easter eggs around the jars for spring.
WHY DECORATE FOR EACH SEASON?
For me, it’s important to decorate for the different seasons, mostly because of my health problems. I have a lot of trouble with changing seasons, especially the end of summer. I love summer and warmth and flowers and being outside. My symptoms that are aggravated by cold, damp, and mold ease up a little in the summer. It’s not a lot, but even a little relief is welcome. It’s my best time of year. Then fall comes around, and I start sneezing and shivering. Winter is just around the bend, and winter is cruel to my body. Spring seems to promise relief, but is cold and wet, and as soon as the sun comes out, pollen comes out with a vengeance, too.
How do you celebrate the beginning of something, when it means the end of what you love best?
I’m learning to celebrate the beauty of what IS while letting go of the beauty of what WAS. Decorations help me to see the beauty of the changing seasons.
But at first, I didn’t redecorate in the best way. I’ve felt a little like I’m erasing, or have to erase, all trace of summer. And for me, that has always meant swapping out the colors I love best, for the colors that fit the season.
Think about it: Autumn is red and yellow. Winter is red and green. Finally when spring rolls around the colors are sky blue, pretty greens, splashes of pinks, and really any color that comes from a flower.
So in the spirit of trying to embrace different seasons, I packed up my blues and pinks and put out yellow and orange. Neither of which are colors I really love. And then I’d swap them out for red and green, and unfortunately the evergreen of Christmas clashed with the mossy greens in the rest of my bedroom, so the décor never really seemed to match.
WHEN DECORATING FINALLY CLICKED
Then it hit me: I love blue. It’s my absolute favorite color. It’s my absolute favorite thing to see in nature. I spent all autumn and winter missing my blue decorations and got so excited and happy when I “could” bring them out again.
It seemed like it was all or nothing—I could either celebrate the seasons, or hang onto my beloved blue. So I did some sleuthing and started looking up color palettes. That’s when I decided that blue and green were going to stay my main decorating colors, and I added red because it really made the orangey reds of autumn pop. And now Elvis would be proud because all my Christmases are blue (sorry Bing Crosby).
You’ve heard “Find you bliss”? My tip is: Find your blue. Find that thing that makes you super happy, and incorporate it into your design year-round.
Maybe your “blue” is a color. Love orange? Who says you can only have orange out in fall? Love hot purple? Find a way to incorporate it.
Maybe your “blue” is something else entirely. Maybe having live plants as part of your décor is the thing that makes you happy. Maybe its polka dots. Maybe its cozy textures. Whatever that “thing” is that makes you happy when you look at the decorations in a room, work that into your design. Find your blue, and enjoy it every day.
A friend and I have a saying for things that match our design aesthetics: “It matches your life!” I love that feeling! When I feel like my surroundings reflect who I am, I feel more at home. What a super-easy way to lift your mood.
(This is partly why I made my own printable—to match my room!)
Now I have a little piece of summer with me, no matter what season is coming or going.
I’d love to hear how your painted jars turn out! Let me know in the comments if you find other fun items to fill your jars.
What is your “blue”? How are you going to incorporate it into your decorating?


3 Comments
Pingback:
Pingback:
Pingback: